

Air Sealing Basics for Lower Energy Bills
Home Repair Solutions
Did you know air leaks can waste up to 40% of your home's energy? Sealing these leaks can cut heating and cooling costs by around 15%, reduce drafts, and improve indoor air quality. Here's what you need to know:
What is Air Sealing? It's the process of closing gaps and cracks in your home to prevent air from escaping or entering.
Why It Matters: Air leaks increase energy bills, stress HVAC systems, and create uncomfortable drafts.
Where to Look: Common leak spots include windows, doors, attics, basements, and ductwork.
How to Fix It: Use caulk, weatherstripping, and foam to seal gaps. Tools like incense sticks or thermal detectors can help locate leaks.
DIY or Hire a Pro? Simple leaks can be fixed yourself, but professionals are better for complex issues like mold, insulation, or ventilation.
Start by sealing visible leaks to save energy and make your home more comfortable. For a deeper dive, read on!
DIY Air Sealing: The best bang for your buck
Finding Common Air Leaks in Your Home
Before sealing up your home, it’s crucial to locate the spots where air is sneaking in or out. Over time, homes naturally develop cracks and gaps that let your heated or cooled air escape while drawing in unconditioned air from outside. The good news? Many of these problem areas are fairly predictable, making them easier to find and address.
Common Air Leak Locations
Air leaks often show up at points where different building materials meet or where openings have been made in your home’s exterior. Windows and doors are the usual suspects. Look closely at the frames - weatherstripping can wear down, and caulking can crack, creating gaps for air to move through.
Your attic is another hotspot for leaks. The attic hatch itself often lacks proper sealing, and additional trouble spots include wiring holes, plumbing vents, and recessed lighting fixtures. Other common pathways for air include areas behind kneewalls, around furnace flues, or along duct chaseways, all of which allow air to flow between your living spaces and unconditioned zones like the attic.
Head down to your basement or crawl space, and you’ll likely find leaks around rim joists. These areas are frequently overlooked during construction and can allow a surprising amount of air to escape.
Throughout your home, check electrical outlets, switch plates, and spots where cable or phone lines, dryer vents, and other utilities pass through walls. Don’t forget to inspect your fireplace damper - when left open or improperly sealed, it can be a significant source of air leaks.
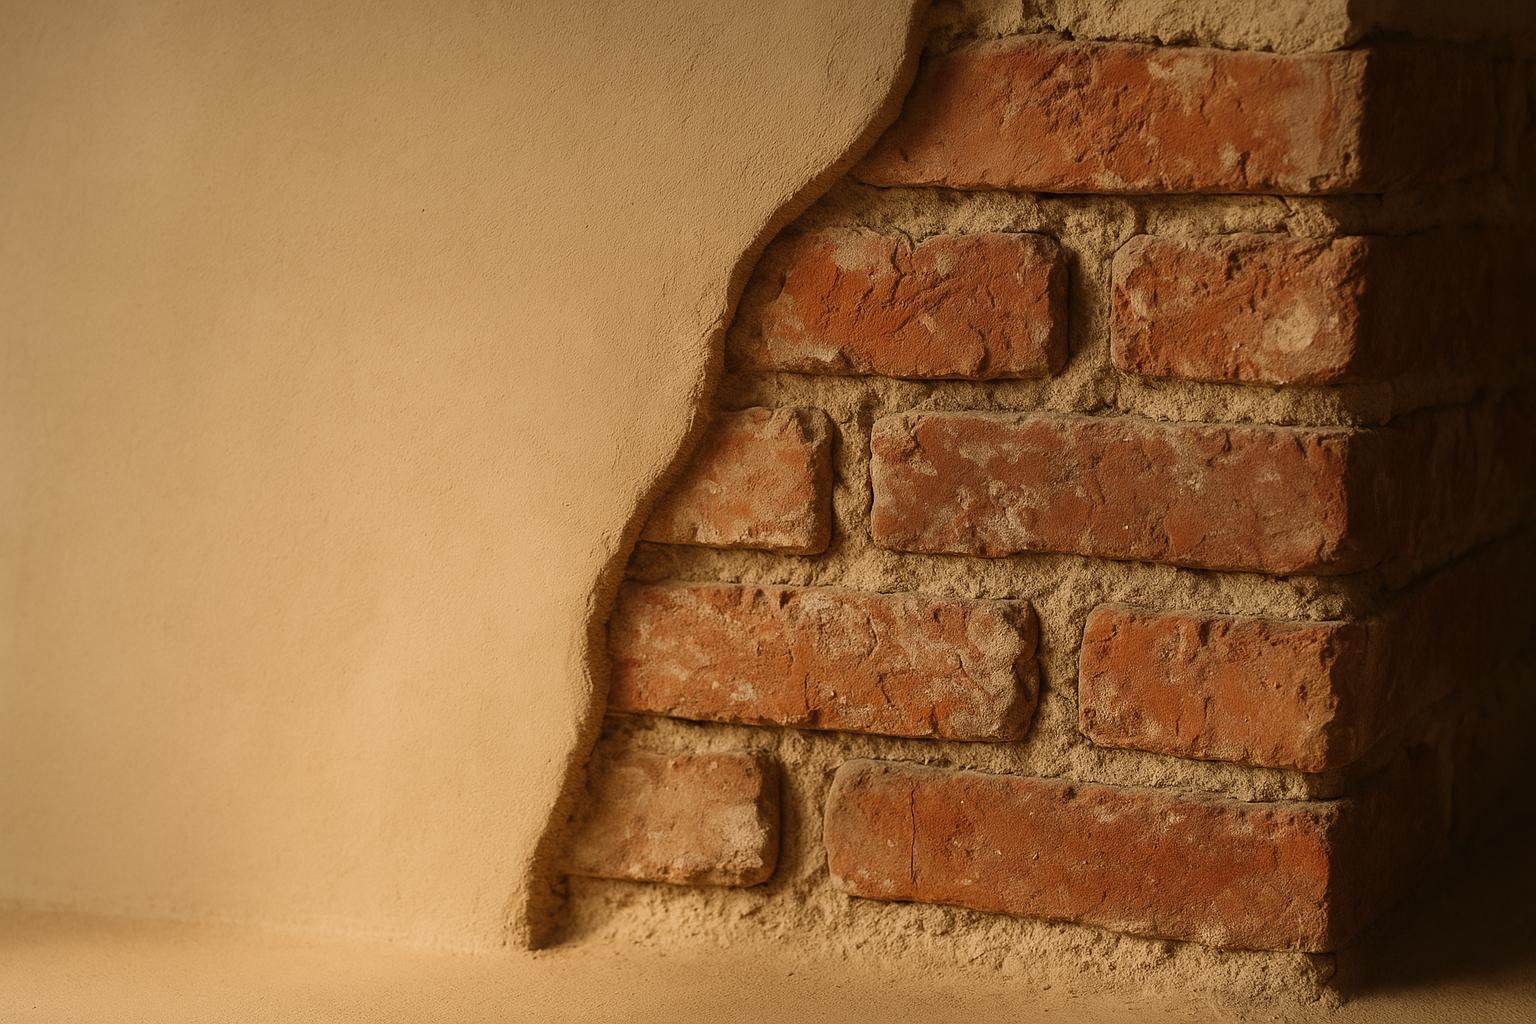
Outside, examine areas where siding meets the chimney, around outdoor faucets, and at exterior corners. The junction between your foundation and exterior brick or siding is another commonly missed spot that can leak air.
"Air leaks are gaps or openings in your home where air can escape (or seep in)." - Sealed
Tools for Finding Air Leaks
You don’t need fancy gadgets to start tracking down air leaks. Begin with a visual inspection. Walk around your home - both inside and out - and look for visible cracks, gaps, or areas where materials have started to separate. Pay close attention to spots where different building materials meet.
On a cool, windy day, use your hand to feel for drafts near windows, doors, and outlets. If you want to boost your sensitivity, dampen your hand slightly - temperature differences will feel more pronounced this way.
Everyday household items can also help. Hold a dollar bill or a piece of toilet paper near areas you suspect might be leaking. If the paper flutters or moves, you’ve likely found a draft.
For a more visual approach, try using an incense stick or a candle. Light it and slowly move it around potential leak spots. If the smoke wavers, gets sucked toward a gap, or is blown away, you’ve identified an air leak. Be cautious when using open flames, especially near flammable materials.
For a systematic check, consider performing a building pressurization test. On a cool, windy day, close all windows and exterior doors, shut off combustion appliances like your furnace and water heater, and turn on all exhaust fans in your kitchen and bathrooms. This creates negative pressure inside your home, making air leaks more noticeable. Use your hand or an incense stick to detect drafts in this setup.
If you’re ready to invest a little money, air leak detectors are available for $20 to $50. These tools come in two varieties: thermal detectors, which sense temperature changes, and ultrasonic detectors, which detect sound waves created by air moving through small openings.
While these DIY methods are great for finding obvious leaks, they might not catch everything. For a more thorough assessment, professional tools like blower door tests can identify even the tiniest gaps. However, starting with these simple techniques will help you tackle the most significant leaks first. Once you’ve pinpointed the problem areas, you’ll be ready to gather the materials needed to seal them effectively.
Tools and Materials for Air Sealing
Once you’ve pinpointed those pesky air leaks, it’s time to gather the right tools and materials to seal them. Most of what you’ll need can be found at your local hardware store or home improvement center. These supplies are the backbone of any effective air sealing project.
Caulking and Sealants
When it comes to sealing cracks and openings between fixed parts of your home, caulk is your go-to. Sealants, on the other hand, are ideal for areas that expand and contract. For indoor projects like sealing around doors, windows, and trim, acrylic latex caulk is a solid option. It’s easy to work with, can be painted over, and adheres well to drywall, wood, and masonry. It’s especially handy for filling narrow gaps around baseboards and crown molding, making it a versatile choice for most indoor sealing tasks.
For areas exposed to moisture, like kitchens and bathrooms, silicone sealant is the better pick. Its flexibility and resistance to water make it perfect for spaces that deal with splashes or steam. Products like DAP KWIK SEAL ULTRA Advanced Kitchen & Bath Sealant are great examples. They feature ultra-hydrophobic technology to repel water, stains, and grime, while also offering lifetime mold and mildew resistance.
For outdoor sealing, look for a sealant with UV protection to prevent discoloration over time. If you’re tackling larger gaps, expandable foam caulk is a reliable choice and comes in either individual cans or kits.
Specialized areas, like those around fireplaces, furnaces, or gas-fired water heater vents, require fire-resistant materials. Combine sheet metal or sheetrock with furnace cement caulk to ensure safety and durability.
Weatherstripping Materials
Weatherstripping is designed to seal moving parts like doors and windows. The trick is choosing a material that can handle repeated movement while keeping a tight seal.
Weatherstripping Type | Best Uses | Cost | Advantages | Disadvantages |
|---|---|---|---|---|
Tension seal (vinyl or bronze) | Inside window tracks, door tops, and sides | Moderate | Long-lasting, nearly invisible once installed, highly effective | Needs flat surfaces; installation can be tricky |
Felt (plain or reinforced) | Door jambs, around windows | Low | Affordable, simple to install | Wears out quickly, less effective, visible |
Foam tape (closed-cell or EPDM rubber) | Window sash, door frames, attic hatches | Low | Very easy to install, forms a tight seal when compressed | Durability varies, visible |
Door sweeps (aluminum with brush/vinyl) | Bottom of doors | Moderate to high | Easy to install, adjustable options available | Can drag on carpets, visible |
For a durable and cost-effective option, vinyl weatherstripping is a great choice. It’s stronger than felt, offers a range of colors and shapes, and is generally less expensive than rubber. That said, rubber weatherstripping is an eco-friendlier option since it’s made from renewable resources.
For double-hung or sliding windows, tension seal weatherstripping works wonders. While it takes a bit more effort to install, it’s practically invisible once in place and provides excellent long-term performance.
Foam tape is perfect for irregular gaps, such as those around attic hatches or non-operable windows. It compresses to form a snug seal, though its durability depends on the type you choose.
Additional Supplies
With your caulking and weatherstripping materials in hand, you’ll need a few essential tools to get the job done right.
Caulking gun: Makes applying caulk easier and more precise.
Putty knife: Helps smooth caulk and remove old material.
Disposable gloves: Protects your hands and simplifies cleanup, especially when using silicone sealants.
Cleaning supplies: Ensures surfaces are free of dirt, dust, and old caulk for better adhesion.
If you’re sealing an attic, sketch out the space to pinpoint leaks. Dirty insulation often reveals where air is escaping. For older homes, test for vermiculite insulation before starting work.
When applying weatherstripping, make sure surfaces are clean and dry. It’s best to work when temperatures are above 20°F (-7°C) to ensure proper adhesion. Measure the perimeter of doors or windows and add an extra 5–10% to account for waste.
With the right materials and tools, you’ll be all set to tackle the next steps in the air sealing process.
Step-by-Step Air Sealing Process
Start with the easiest areas to access and gradually work toward more challenging spots. Clean all surfaces, apply sealants, and ensure a tight, secure seal as you go.
Windows and Doors
Windows and doors are a great place to kick off your air sealing project. These areas are easy to access and can quickly enhance both comfort and energy efficiency.
Clean and prep surfaces: Make sure all surfaces are clean and dry before applying any sealants.
Seal window frames: Check the caulk lines on both the interior and exterior of the frames. Use acrylic latex caulk to fill gaps between the window frame and the wall. Smooth the caulk with a tool to create a continuous seal, paying special attention to corners where leaks are common.
Weatherstrip doors: Measure the door frame perimeter and cut weatherstripping material to fit. Tension seal weatherstripping works well for door jambs - secure it with nails or staples so it forms a snug seal when the door is closed.
Install door sweeps: Add a door sweep to the bottom of the door to block drafts and improve energy efficiency.
Once these areas are sealed, move on to attic and basement spaces to address hidden leaks and tighten your home’s overall envelope.
Attics and Basements
Sealing air leaks in attics and basements can significantly reduce energy waste. These areas are key to stopping the "chimney effect", where warm air escapes through the attic, pulling cold air in through the basement.
Attic Air Sealing
Focus on common problem spots: Check behind kneewalls, around attic hatches, wiring holes, plumbing penetrations, dropped soffits, recessed lights, and furnace flues.
Look for displaced insulation: This often indicates air leaks.
Seal large gaps first: Concentrate on areas where walls meet the attic floor, dropped soffits, and behind kneewalls. Use expanding foam or caulk for gaps around plumbing pipes and electrical wires.
Handle furnace flues carefully: Use aluminum flashing and high-temperature caulk, ensuring proper clearance from combustible materials.
Test for asbestos: If you find vermiculite insulation, have it tested for asbestos before disturbing it.
Basement Sealing
Target common leak areas: Inspect gaps around rim joists, the sill plate, the foundation, and penetrations for pipes, wires, and ducts.
Seal cracks and gaps: Use the appropriate sealant based on the size of the gap.
Pay attention to ceiling penetrations: Seal areas like furnace flues with high-temperature caulk.
Insulate rim joists: After sealing, consider adding rigid foam insulation or fiberglass batts to improve energy efficiency.
By addressing these areas, you’ll cut down on energy loss and make your home more comfortable.
Ductwork and Vents
Leaky ductwork is another major source of energy loss. In fact, studies show that poorly sealed ducts can reduce heating and cooling efficiency by as much as 20%, with 20–30% of air often lost through leaks or poorly connected ducts.
Seal duct joints: Use UL 181-rated mastic sealant and mesh tape for a durable fix. Apply the mastic evenly, ensuring at least a 1/2-inch overlap. For gaps larger than 1/4 inch, reinforce the seal with mesh tape.
Consider aluminum foil tape: While quicker to apply, foil tape is usually a temporary solution. Avoid conventional duct tape, which tends to dry out and crack.
Check all accessible ducts: Focus on ducts in attics, crawlspaces, unfinished basements, and garages. Also, ensure that connections at vents and registers are properly sealed.
Properly sealed ductwork works in tandem with your HVAC system to improve energy efficiency and enhance indoor air quality.
Lastly, keep in mind that sealing your home too tightly can trap indoor pollutants. To maintain healthy indoor air quality while maximizing energy efficiency, make sure your home has proper ventilation - whether through natural airflow, spot ventilation, or a whole-house system.
When to Hire a Professional for Air Sealing
After tackling straightforward air leaks through DIY methods, it's wise to call in professionals for more complex issues. While sealing gaps around windows, doors, and outlets can often be handled on your own, certain problems require an expert's touch. For example, challenges like water-damaged insulation, improper venting, old knob-and-tube wiring, ice dams, mold, rot, or poor ventilation are best left to experienced contractors.
Hiring professionals becomes essential for addressing tricky attic conditions. Cramped spaces, damp insulation signaling roof leaks, mold growth, or ventilation problems demand specialized skills. If your home has pre-1930 knob-and-tube wiring, it’s a fire hazard when it comes into contact with insulation and must be dealt with by experts.
While professional air sealing projects typically cost between $5,000 and $12,000, the investment pays off. These services can lower energy bills by up to 15% and reduce energy waste by as much as 45%. Tackling these more intricate issues requires the in-depth analysis and tools that only professionals can provide.
Benefits of Professional Air Sealing
Professionals bring advanced tools to the table, capable of identifying even the smallest leaks. Studies reveal that many homes exchange air at rates three to four times higher than recommended, leading to unnecessary energy loss.
The benefits of professional air sealing go beyond just saving money. It can cut energy bills by up to 20%, improve indoor air quality, and prevent moisture buildup that causes mold or structural damage. Additionally, it helps extend the life of HVAC systems, boosts home value, and reduces greenhouse gas emissions by up to 1,500 pounds annually. Since air sealing is typically a one-time fix, the upfront cost becomes a long-term investment.
For a comprehensive approach, scheduling a home energy audit with a professional contractor is the most effective way to identify all air leaks in your home.
Eco Home Repair's Expertise

Eco Home Repair specializes in providing tailored air sealing solutions for the Pacific Northwest's unique climate. For homeowners in Marysville, WA, and surrounding areas, the company’s deep understanding of local weather conditions and building practices ensures effective, long-lasting results. Their commitment to eco-friendly practices and sustainable materials makes them a perfect choice for air sealing projects aimed at improving energy efficiency.
With extensive experience in structural repair, window and door installation, and roof work, Eco Home Repair is well-equipped to handle the complexities of air sealing. Their team knows how to integrate air sealing with other home improvement efforts, ensuring that weatherization measures work seamlessly with any previous DIY fixes.
The Pacific Northwest’s wet winters and fluctuating temperatures present specific challenges, but Eco Home Repair’s local expertise ensures these are addressed effectively. By combining their knowledge of regional building standards with a focus on maintaining proper ventilation, they deliver solutions that enhance energy efficiency while promoting healthy indoor air quality.
Save Energy and Improve Home Comfort
Air sealing is one of the simplest ways to lower heating and cooling costs while making your home more comfortable. With 9 out of 10 homes in the U.S. lacking proper insulation, most homeowners have room to improve their energy efficiency. This not only helps reduce utility bills but also creates a cozier, longer-lasting home.
By sealing air leaks, you can cut heating and cooling expenses by about 15%. When combined with proper insulation, total energy savings can climb to as much as 20%. According to ENERGY STAR, “a well-sealed envelope, coupled with the right amount of insulation, can make a real difference on your utility bills”.
Beyond saving money, air sealing eliminates pesky drafts and cold spots, helping to maintain even temperatures throughout your home. It also reduces the workload on your HVAC system, which can extend its lifespan and lower maintenance costs. Plus, sealing gaps helps keep out outdoor pollutants, dust, and allergens, improving indoor air quality.
The benefits don’t stop there. By using less energy, your home generates fewer greenhouse gas emissions, helping to reduce its environmental footprint. It’s a win-win for both your wallet and the planet.
Whether you tackle air leaks yourself or hire professionals like Eco Home Repair, addressing these issues is a vital step toward a more efficient and sustainable home. For homeowners in Marysville, WA, where the Pacific Northwest’s weather can be unpredictable, working with experts ensures your air sealing efforts are effective while maintaining proper ventilation for healthy indoor air.
Start by sealing visible leaks and consider scheduling a professional energy audit to uncover hidden energy losses.
FAQs
How can I tell if my home has air leaks?
There are a few telltale signs that your home might have air leaks. Do you notice drafts around windows, doors, or other openings, even when everything is securely closed? That’s a common clue. Another is uneven temperatures - if certain rooms always feel hotter or colder than others, air leakage could be the culprit. Sky-high energy bills are another red flag, as your heating or cooling system might be overworking to make up for lost air. On top of that, an unusual amount of dust or worsening allergy symptoms can hint that outdoor air is sneaking in through gaps. Spotting these signs early can make a big difference in keeping your home comfortable and energy-efficient.
Should I air seal my home myself or hire a professional?
Deciding whether to tackle air sealing your home on your own or to bring in a professional largely depends on your experience, the size of the project, and how comfortable you are with home improvement tasks. For smaller, simpler jobs - like sealing gaps around windows or doors - DIY can be a practical option. It’s a chance to save some money and take charge of the work yourself.
On the other hand, if your home has more extensive or hard-to-access leaks, such as those in the attic or crawl spaces, or if you’re not confident in pinpointing all the problem areas, hiring a professional might be the smarter move. Professionals come equipped with the right tools and expertise to ensure a thorough job, which can lead to better energy efficiency in the long run. Weigh the time, effort, and cost of doing it yourself against the convenience and precision a professional brings to decide what works best for you.
How does air sealing improve indoor air quality and home comfort?
Air sealing plays a key role in boosting indoor air quality. By cutting down on drafts and blocking outdoor pollutants like dust, pollen, and exhaust fumes, it helps create a cleaner, healthier space to live. This means less exposure to allergens and other harmful contaminants. On top of that, sealing gaps can help control moisture levels, lowering the chances of mold growth and other moisture-related issues.
But that's not all - air sealing also makes your home more comfortable. It eliminates those annoying drafts and cold spots, ensuring your indoor temperatures stay consistent no matter the season. And as a bonus, it eases the workload on your heating and cooling systems, which can lead to noticeable savings on your energy bills while keeping your home cozy and efficient.
Related posts


Contact Us
Free Estimates for Your Home Improvement Project!
Share your ideas with us! We’ll set up a free consultation to discuss your vision and start planning a home improvement tailored just for you.